Advertisement
Forward My .AM Domain With Cloudflare
Here’s a guide to forward and redirect your .am domain using Cloudflare. Cloudflare makes it simple to manage DNS records and create redirects, allowing you to seamlessly forward your .am domain.
Step-by-Step Guide to Forward and Redirect Your .am Domain with Cloudflare
Step 1: Add Your .am Domain to Cloudflare
1. Log in to Cloudflare (or create an account if you don’t have one).
2. Add Your Domain:
-
On your Cloudflare dashboard, click Add a Site.
-
Enter your .am domain (e.g., yourdomain.am).
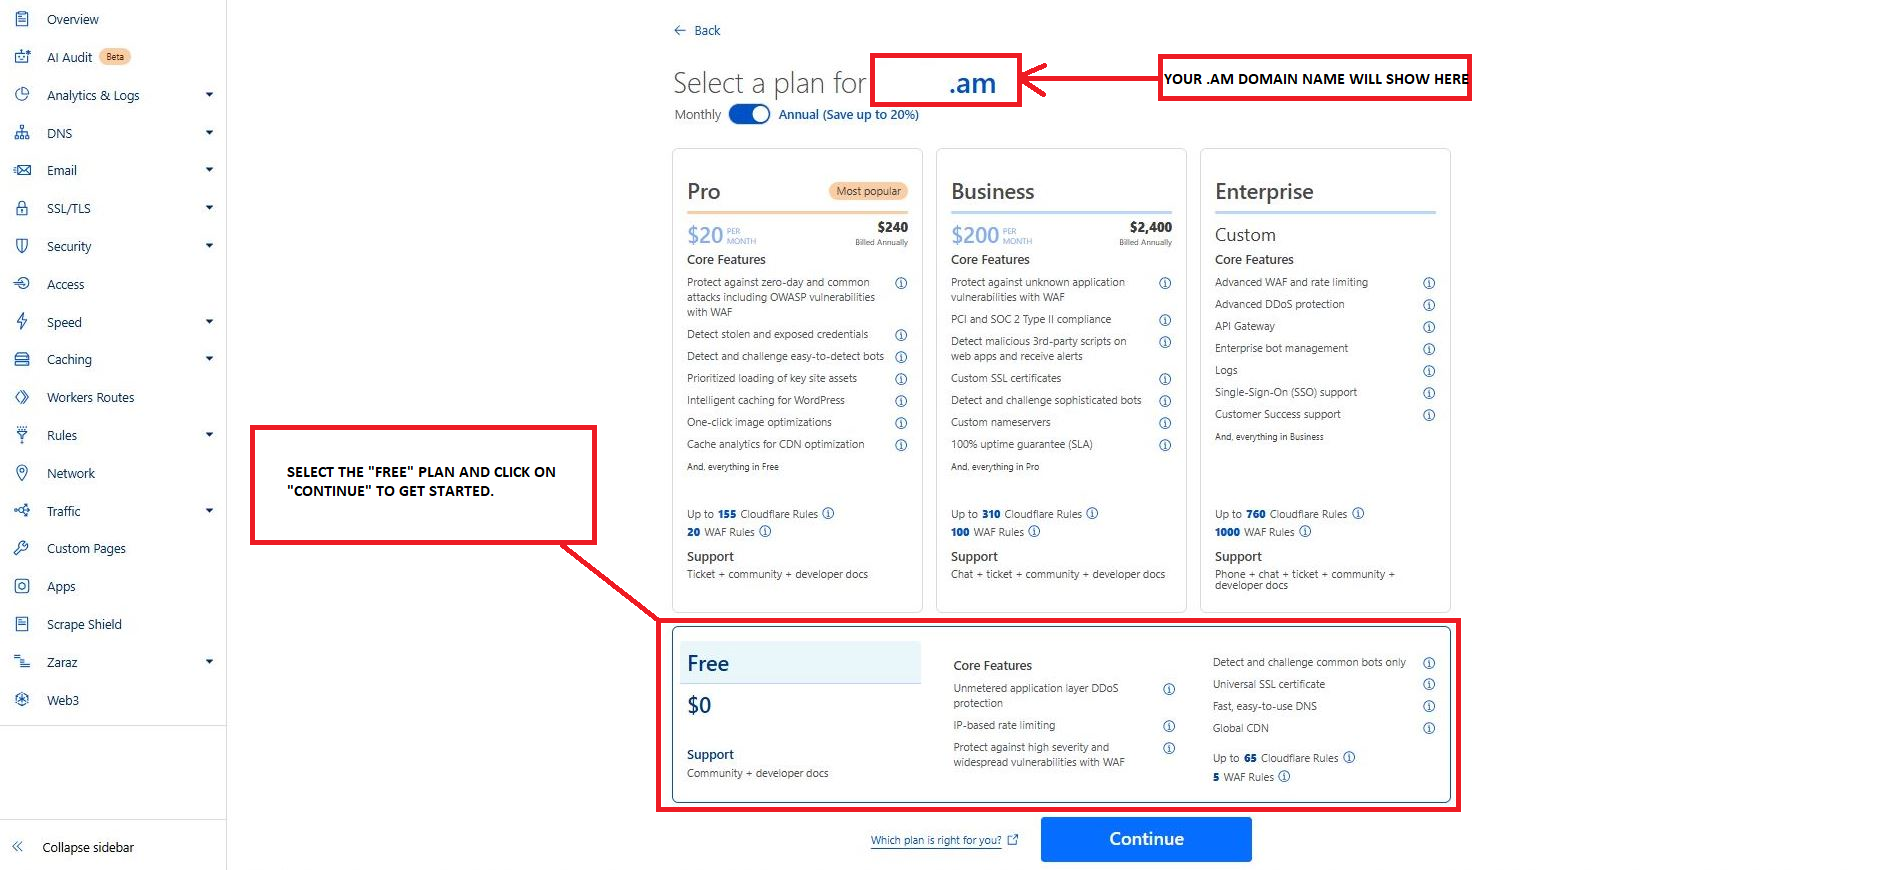
3. Select a Cloudflare Plan:
-
Cloudflare offers a free plan which should work fine for basic redirection.
-
Select the appropriate plan and continue.
4. Update Proxy and DNS Settings:
-
Cloudflare will require you to update Proxy and DNS settings for your domain before redirecting or forwarding.
-
If you find information such old TXT Records, A Records, etc., from the domain you added, and you didn’t add that information, just delete that information and start fresh with the new settings.
Step 1: Create records click “Add Record”
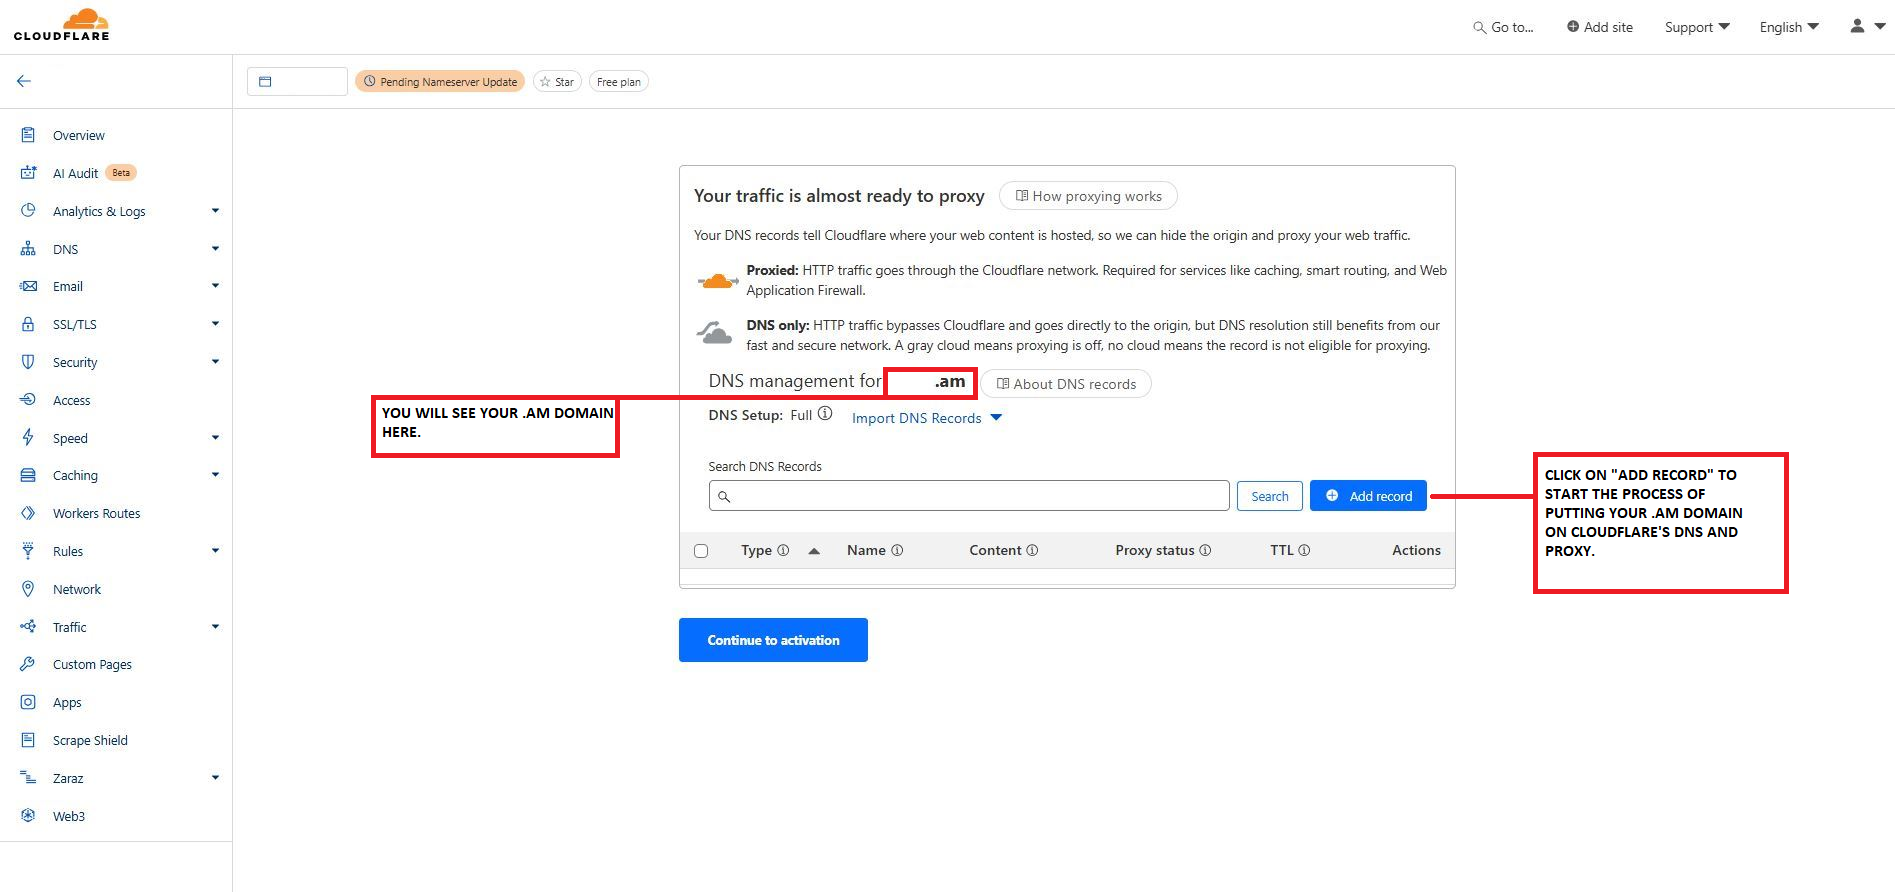
Step 2: Create your first “A Record” with the “@” symbol where it says “Name (Required) and click “Save”.
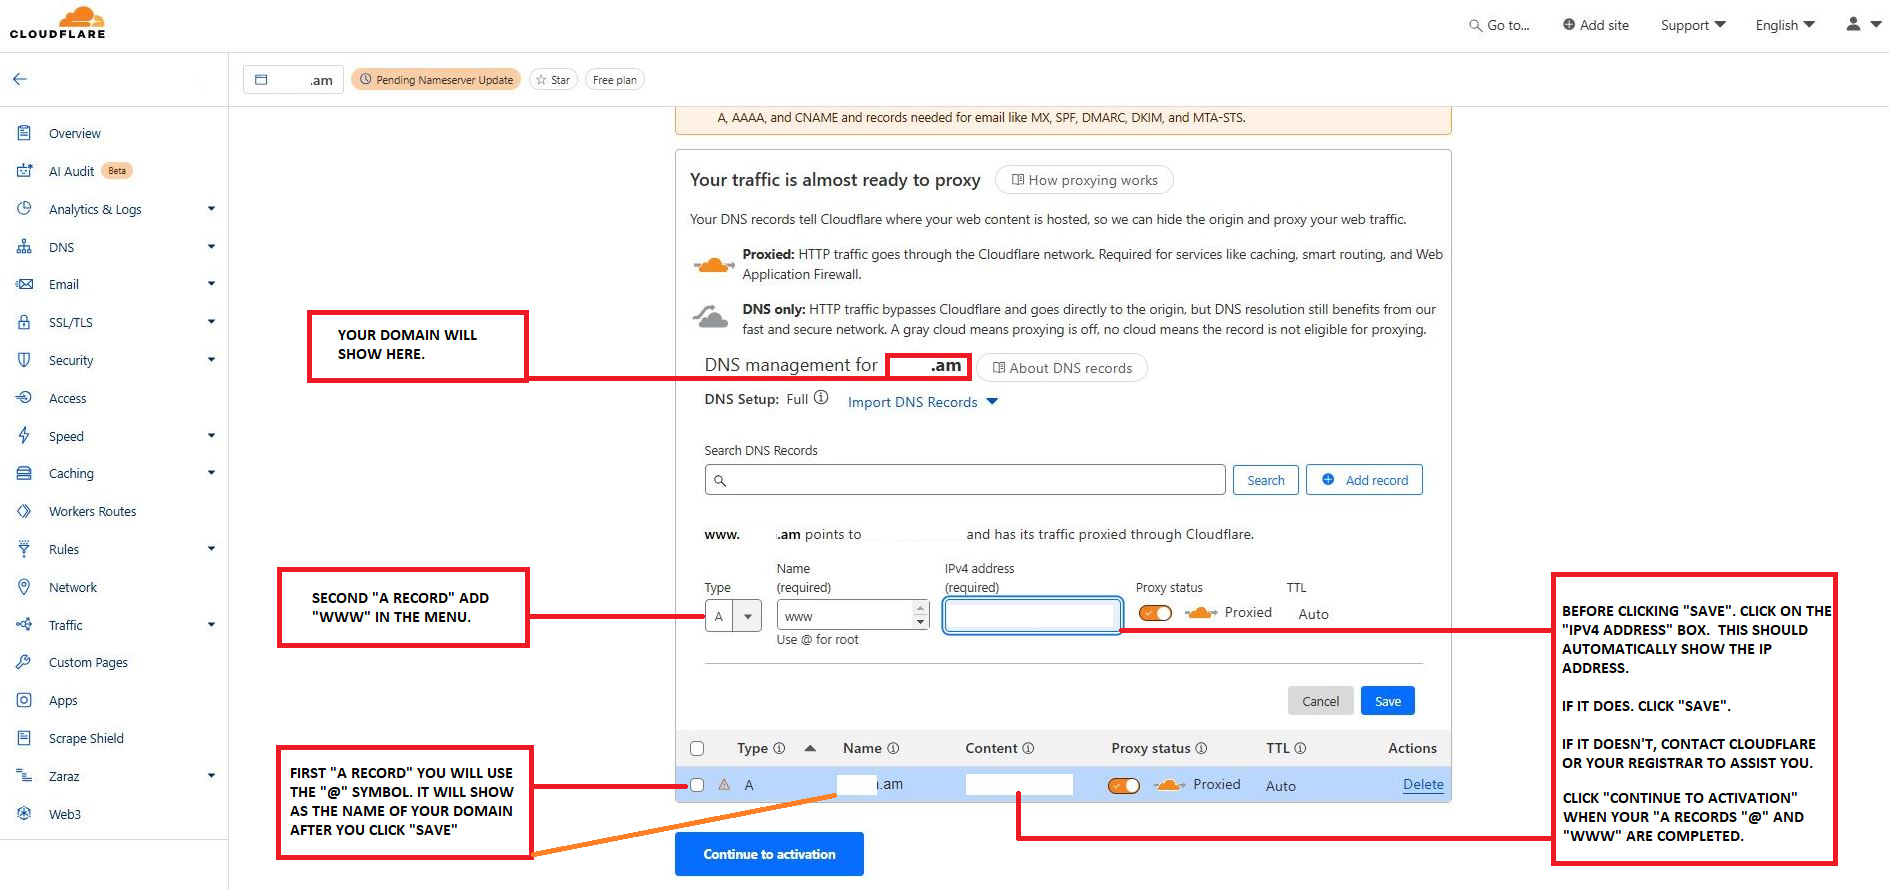
Step 3: Create your second “A Record” with “www” where it says “Name (Required) and click “Save”.
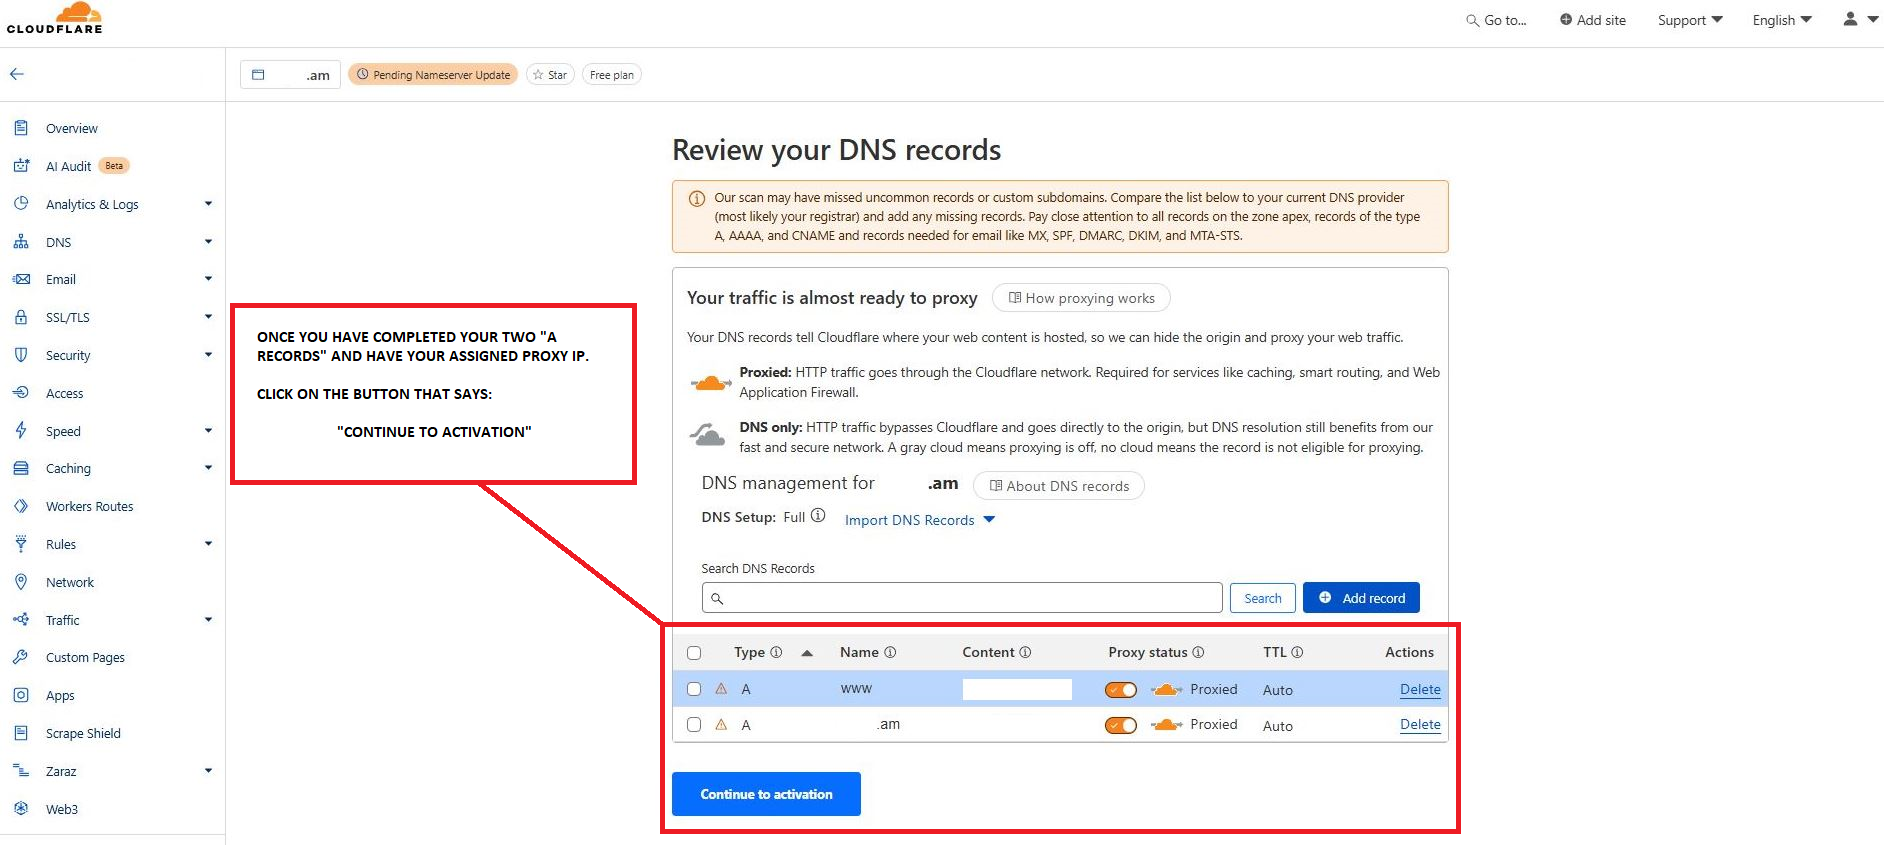
Step 4: Click “Continue to activation”
5. Update Nameservers:
-
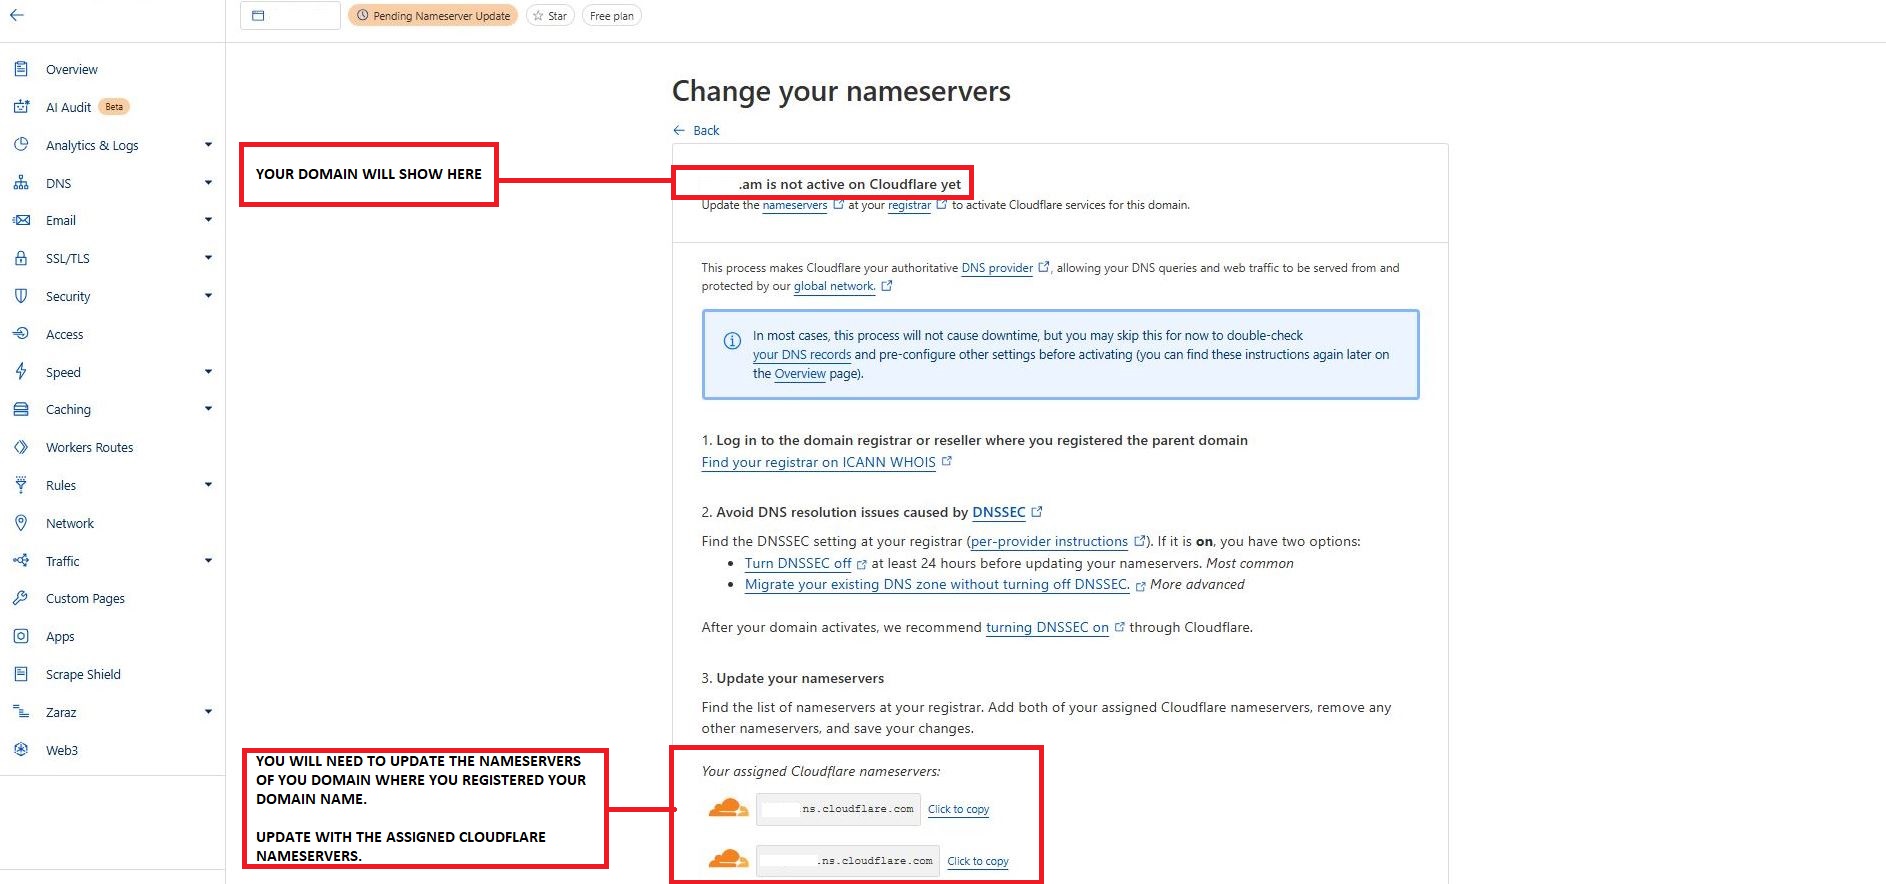
Cloudflare will provide nameservers for you to update at your domain registrar (the site where you purchased your .am domain).
-
Log into your registrar’s dashboard, find the DNS settings, and replace the existing nameservers with the ones Cloudflare provided.
5. Verify:
-
Once you update the nameservers, return to Cloudflare and click “Continue”. It may take up to 24 hours for the nameserver changes to propagate.
Advertisement
Written by Armenia Domains
November 3, 2024
Related Articles
Cheapest .AM Domain Registrations Starting at $20
Registrars providing .AM domain name registrations from $20 and above.
A I AM – .AM and Artificial Intelligence
Uses of the .am ccTLD as an alternative to .AI, .ML, .IO, .XYZ and other domain extensions currently in use for Artificial Intelligence.
Affiliate
Turning 30. The .AM Turns 30 in 2024
Learn about the 30 year history of the .am ccTLD.
Advertisement
Step 2: Set Up a Redirect with Cloudflare Page Rules
1. Access Page Rules:
-
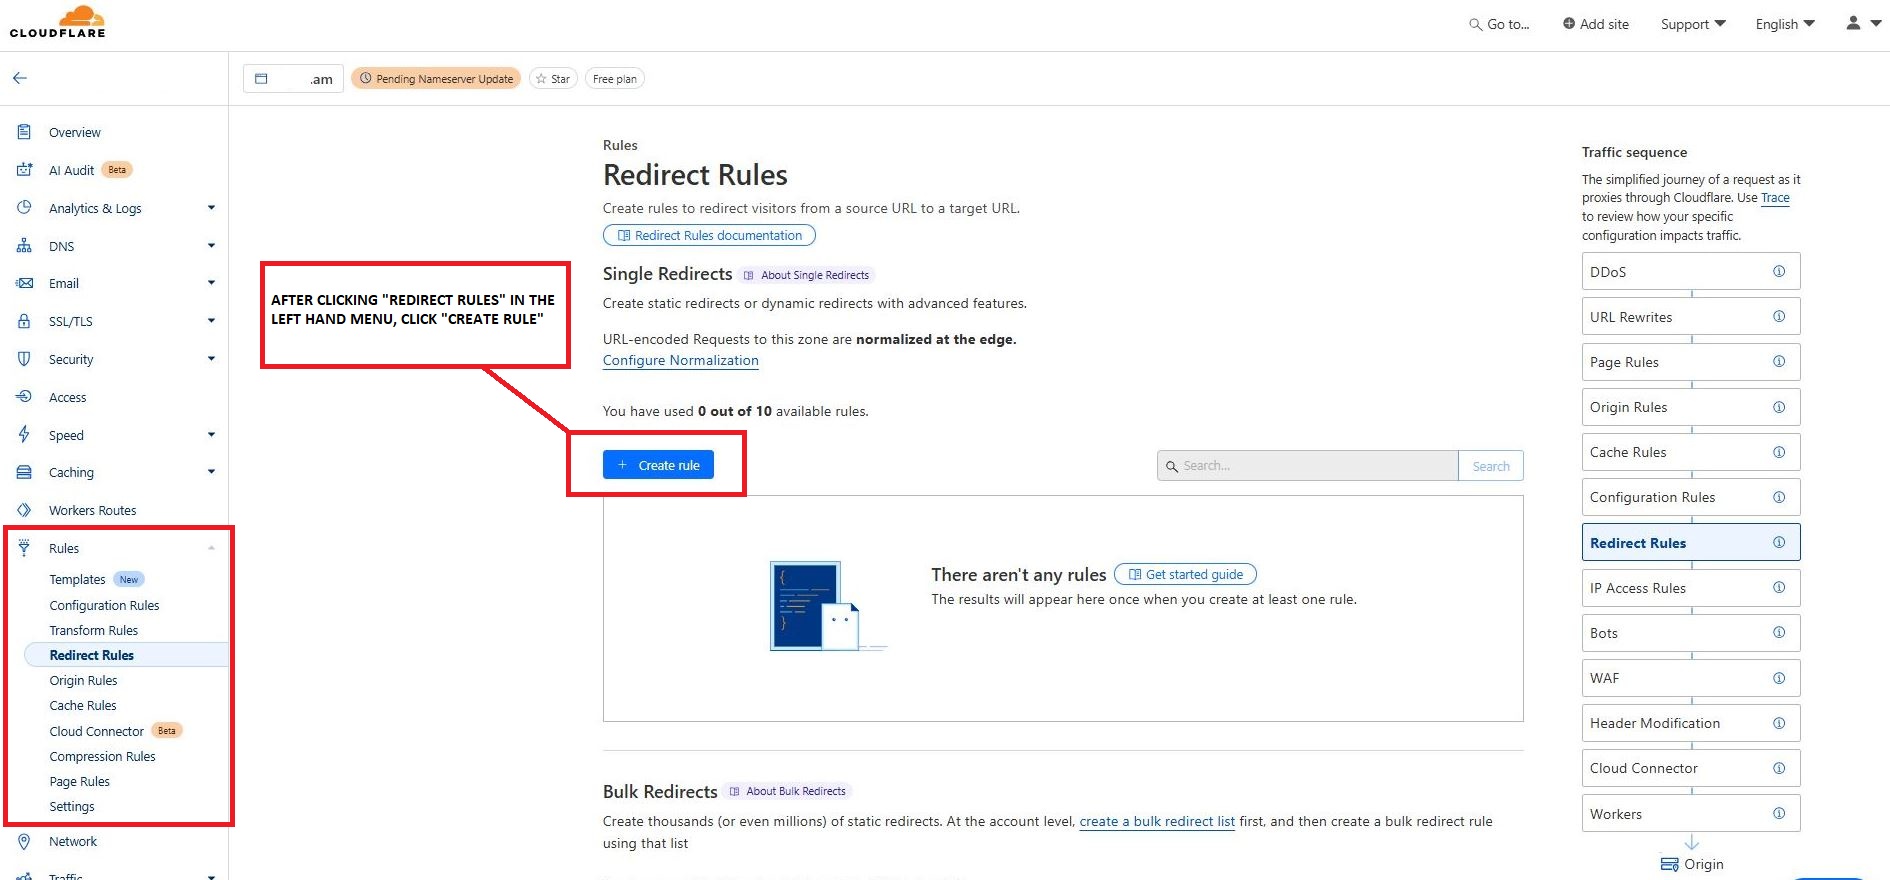
In your Cloudflare dashboard, go to Redirect Rules on the left sidebar.
-
Click on Create Rule.
2. Create a New Redirect Rule:
-
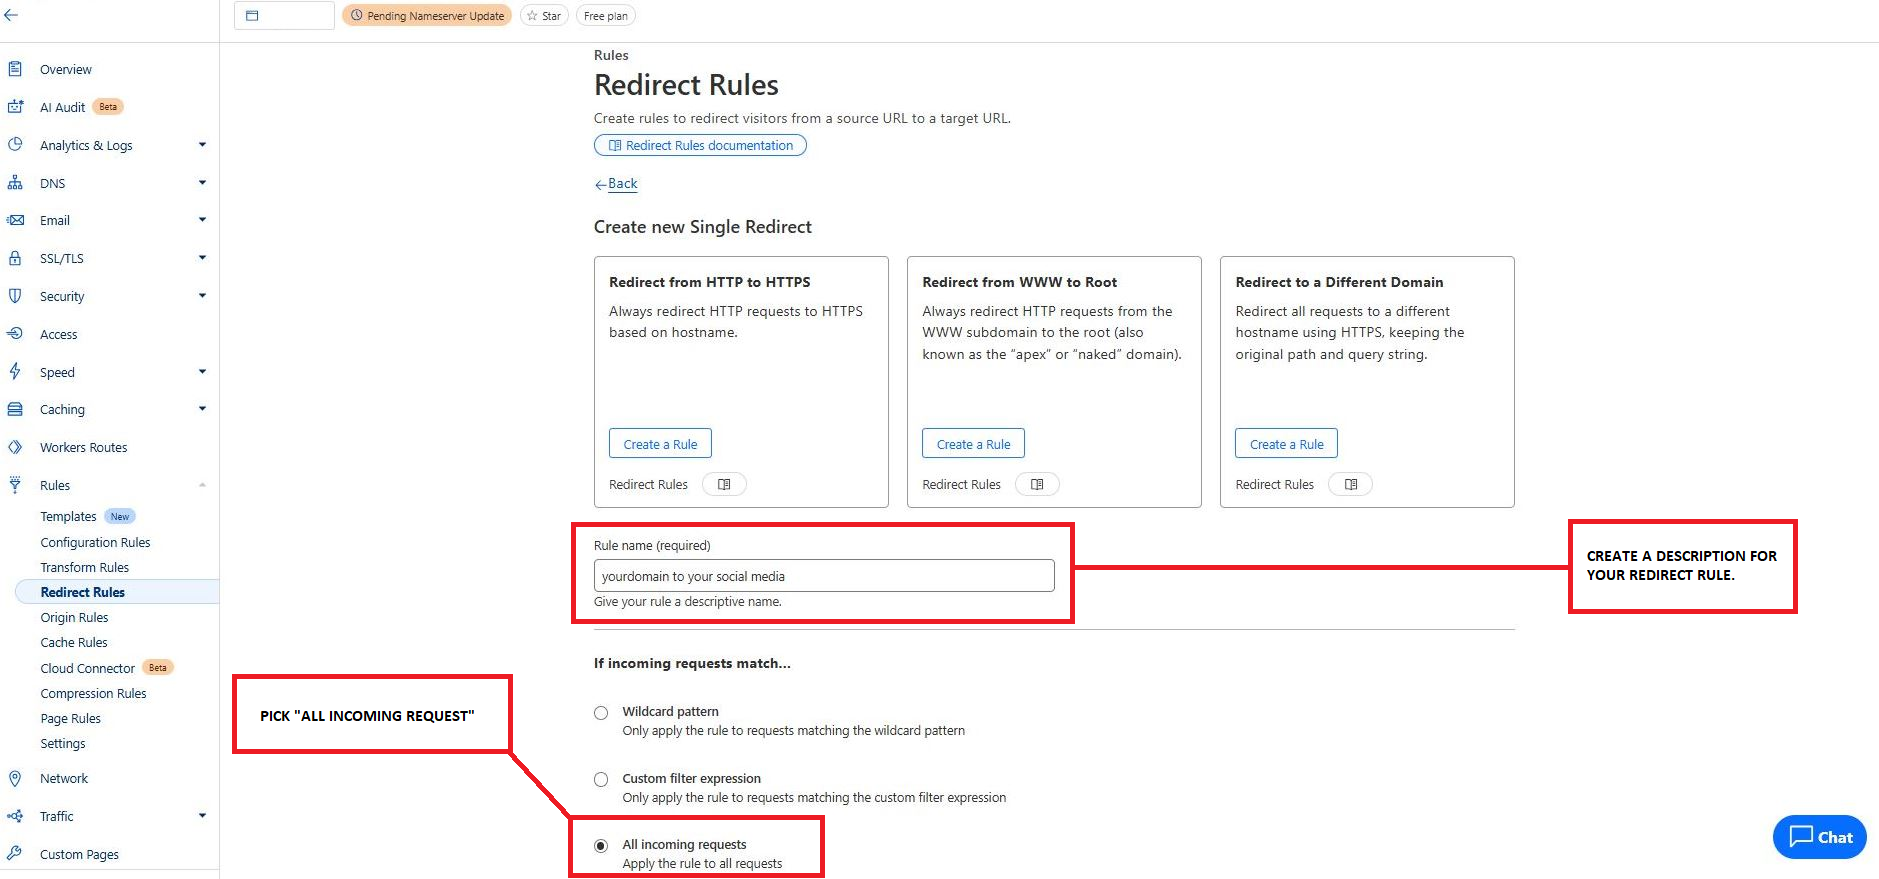
Select “All Incoming Request”.
3. URL Redirect:
-
In the settings below “If incoming requests match…”, you will see “Then..”. Select “Type as “Static”. Type or paste the URL you want to redirect to and select “Status Code” as:
-
301 Permanent Redirect: If the redirect is meant to be permanent.
-
302 Temporary Redirect: If you might change it in the future.
-
**Specify the URL where you want to forward the traffic (e.g., https://yourcoolsite. com/) or your social media page.
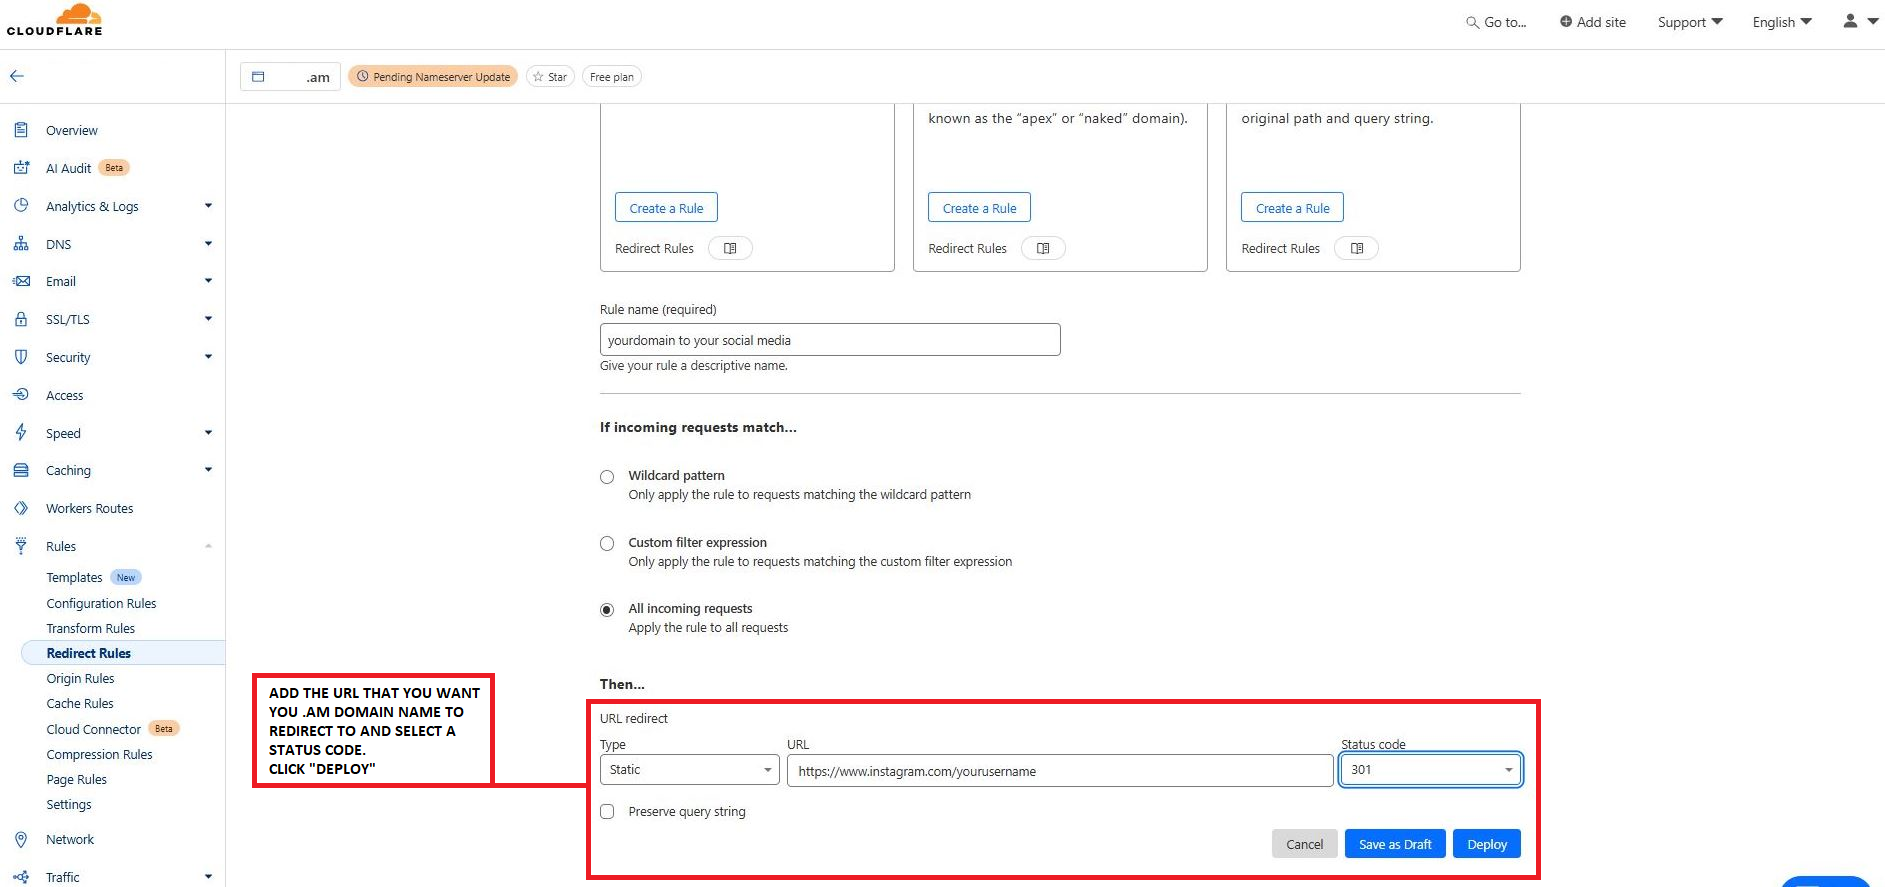
5. Save and Deploy:
-
Click Save and Deploy to activate the redirect.
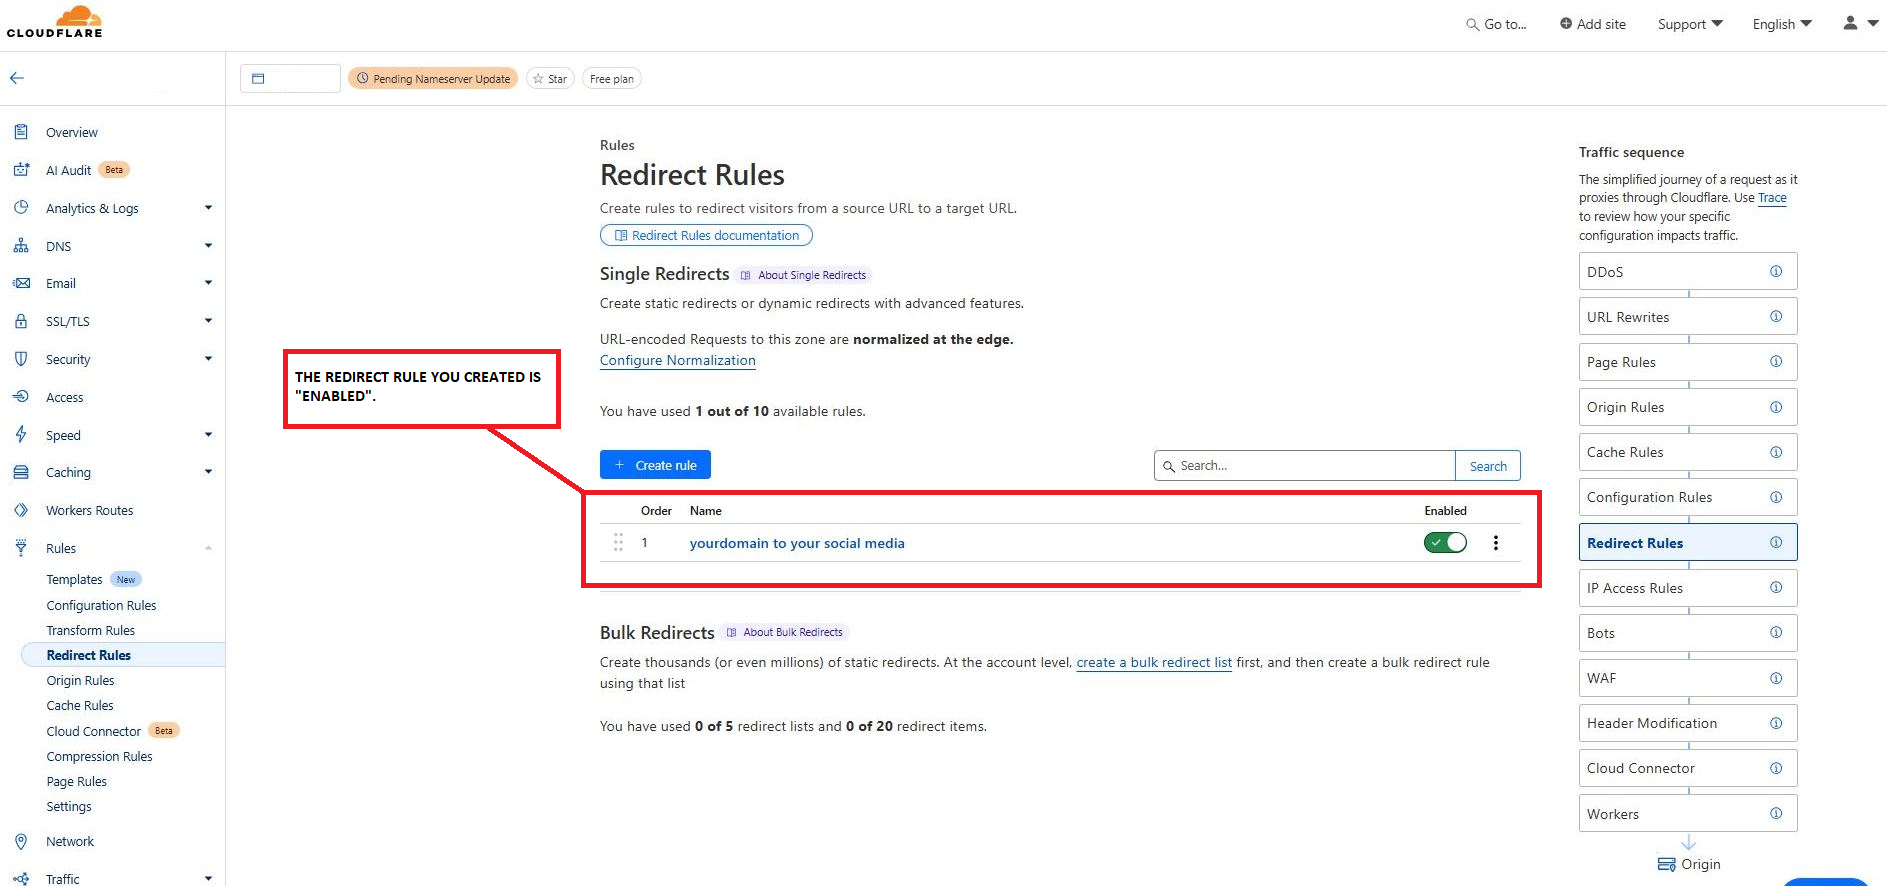
Step 3: Confirm the Redirect
1. Clear Cache:
-
After setting up your redirect, clear your browser cache or open a new incognito window.
2. Test the Redirect:
-
Enter your .am domain in the browser and check if it redirects to the destination URL.
-
If it doesn’t work immediately, allow a few minutes for the DNS changes to propagate.
Conclusion
By following these steps, you’ll have successfully forwarded your .am domain with Cloudflare.
More Articles On Forwarding
Advertisement
Trending Articles
Explore how the .AM ccTLD can be used in the evolving field of Web 3 and blockchain.
Advertisement
Affiliate

Affiliate

Further Reading

Cheapest .AM Domain Registrations Starting at $20
Registrars providing .AM domain name registrations from $20 and above.

.AM domain name registration frequently asked questions.
Advertisement
Stay Up to Date With The Latest News & Updates
Follow Us


